The CAGED System
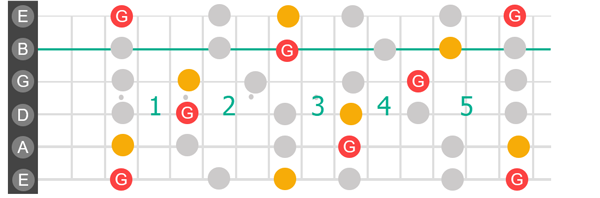
The CAGED system was introduced in the 70's to help people play scale tones on the fretboard. The main criticism of the CAGED system is its "boxy" sound, as players spend too much time in one shape and they're unable to move smoothly between shapes. Here are shapes one and five of the CAGED system.

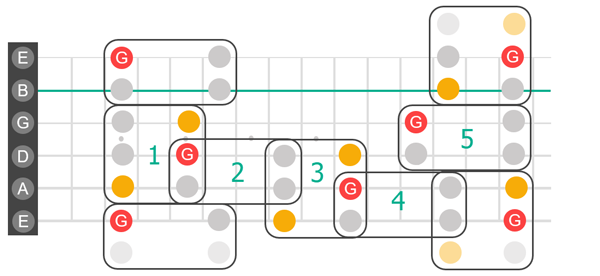
Here are all five CAGED shapes.
As soon as we add Freedom Block outlines the shapes are much easier to visualize.
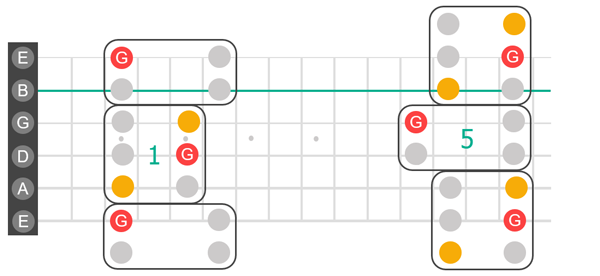
Moving from shape one to five would be a big jump if you didn't know how to move horizontally with Freedom Blocks.
With CAGED shapes you don't have to worry about the B string shift. It's hardwired into the shapes. Consequently the shapes are "locked" to the low E string and you can't start a CAGED shape on any other string.
Creating CAGED Shapes Using Freedom Blocks
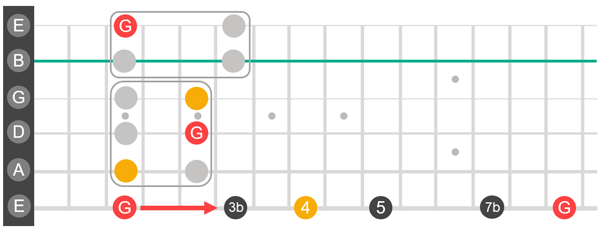
Let's recreate all five CAGED shapes using what you already know about Freedom Blocks. This exercise will cover every possibility that you'll run into when moving vertically. We'll start with the G minor pentatonic scale laid out on the low E string.
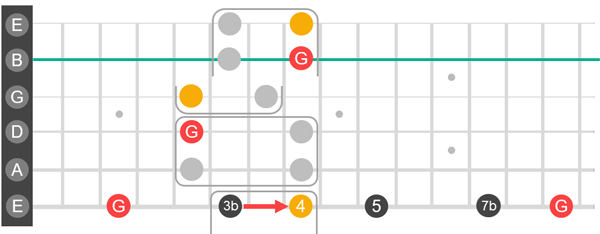
First Interval
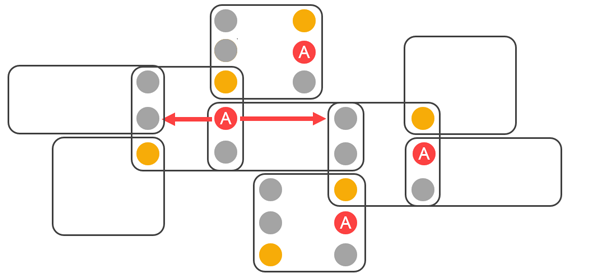
The first interval of the G minor pentatonic scale starts on row 2 of a rectangle. You'll immediately rotate to a square, followed by a rectangle. Both rows of the rectangle shift up one fret because they land on the B and E strings.
(Notation: E3-6, A3-5, D3-5, G3-5, B string shift, B3-6, E3-6)
Second Interval
The second interval is row 3 of a square. Play those two notes, then rotate to a rectangle on the A and D strings. After the rectangle, rotate to a square and make the B string shift.
(Notation: E6-8, A5-8, D5-8, G5-7, B string shift, B6-8, E6-8)
Third Interval
The third interval starts on row 1 of a square. After completing the square you switch to a rectangle. Row 2 of the rectangle and row 1 of a square get shifted up one fret on the B and E strings.
(Notation: E8-10, A8-10, D8-10, G7-10, B string shift, B8-11, E8-10)
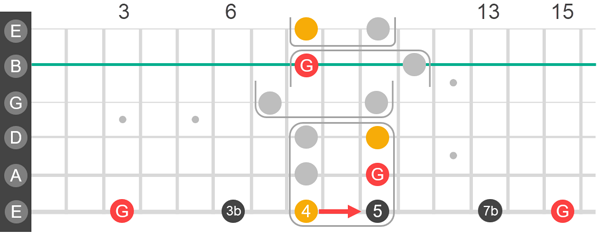
Fourth Interval
The fourth interval is row 1 of a rectangle. Complete the rectangle on the A string, then rotate to a square. Row 3 of the square shifts up one fret on the B string. Row 1 of the next rectangle maintains its relative position, aligning on the right side.
(Notation: E10-13, A10-13, D10-12, G10-12, B11-13, E10-13)

Fifth Interval
The fifth interval is row two of a square. Complete the square on the A string, then rotate to a rectangle. Finish with rows one and two of a square shifted up one fret.
(Notation: E13-15, A13-15, D12-15, G12-15, B13-15, E13-15)
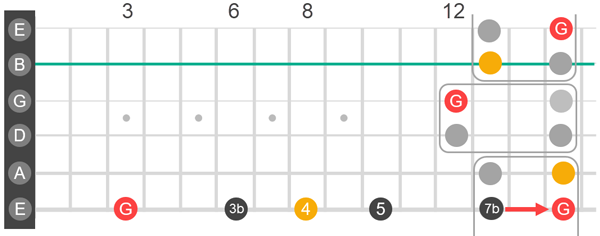
Can you figure out why these two stacks look the same?

You have just played every note in the G minor pentatonic scale up to 15th fret using stacked Freedom Blocks. Congratulations!
(Answer to my question: the fretboard repeats itself starting on the 12th fret.)
Shapeless But Not Clueless
Once you understand Freedom Blocks, all you need is a root note.
(Location of A roots: E5, A0-12, D7, G2-14, B10, E5) (Key: A minor pentatonic)
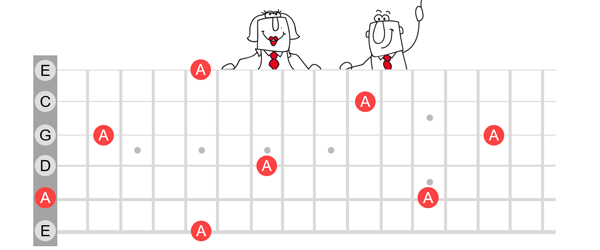
Once you're sitting on root note in the key of A minor pentatonic, you're ready to move.

If you move left, you're in a square; if you move right, you're in a rectangle heading to another square. It's that simple.

You can move about using stepping squares, overlapping rectangles, side-steps and stacking blocks. Let the groove be your guide and keep an eye out for the B string.
From a distance Freedom Blocks can look like a traffic jam, but that's not your viewpoint.
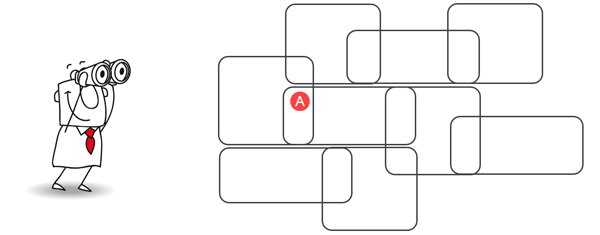
Instead you're sitting in one square or rectangle, deciding which direction you want to go, and jamming as you move on out the "fretway".

He didn't say that, but you get the idea.
Solo Inspiration
Scales are a good starting point, but once a backing track starts, it's time to get creative. You can repeat notes, go up three notes and back two, repeat a series of three or four notes, slide, bend, slow down and speed up. Ian at Stichmethod.com suggest watching Gen Kelly dancing in the movie, Singin' in the Rain, for inspiration on soloing.